-

Chic cupboard makeover -

Chic cupboard makeover
PHOTOS Antonie Robertson
DIFFICULTY Intermediate | TIME 6 hrs
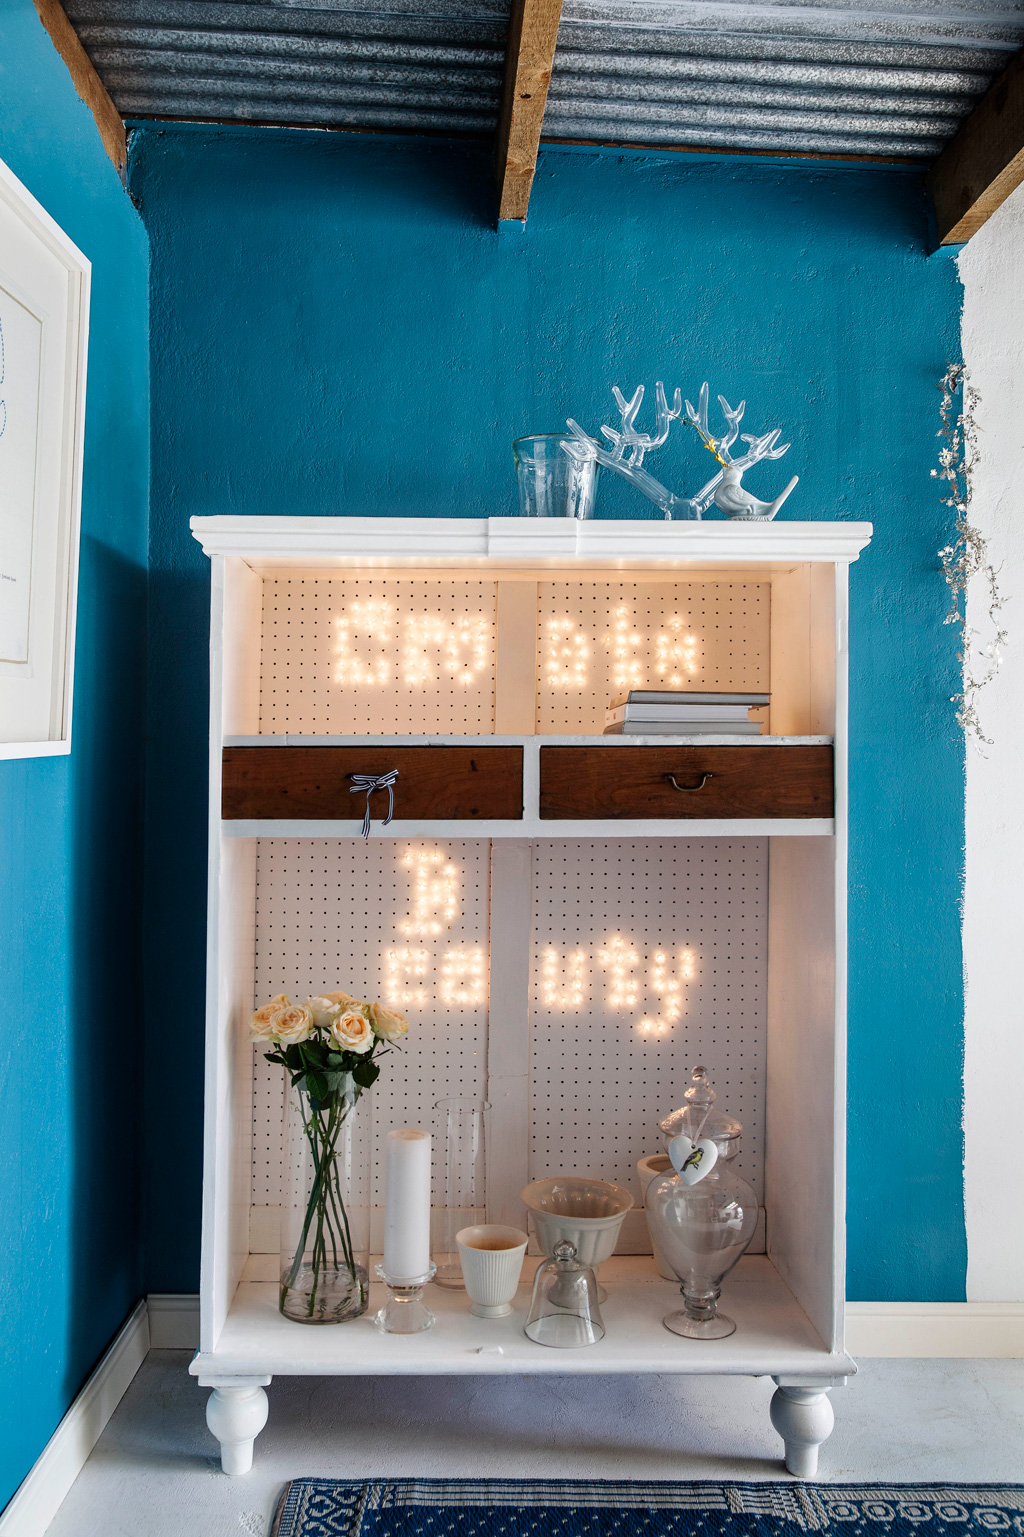
This is the perfect weekend makeover. Sneak peek number three from Misi Overturf’s self-published Real Easy Decor & DIY book is all about the power of transformation. With a few licks of paint and some fairy lights, what was destined for the rubbish dump, has become a beautiful centerpiece!
What you’ll need
An old cupboard
Sand paper 160 – 180 grit and sanding block
Wood filler and spatula
High gloss white paint
Foam roller, tray and paintbrush
Peg board (cut to size to fit the back of the cupboard)
Panel pins
Hammer
Light grey paint
Small brush
Letters printed on A4 paper spelling out CREATE BEAUTY
Clear acetate
Cutting knife
Cutting board
Nails
Fairy lights
Cordless drill
5 mm drill bit
Ribbon (to improvise as a drawer handle)
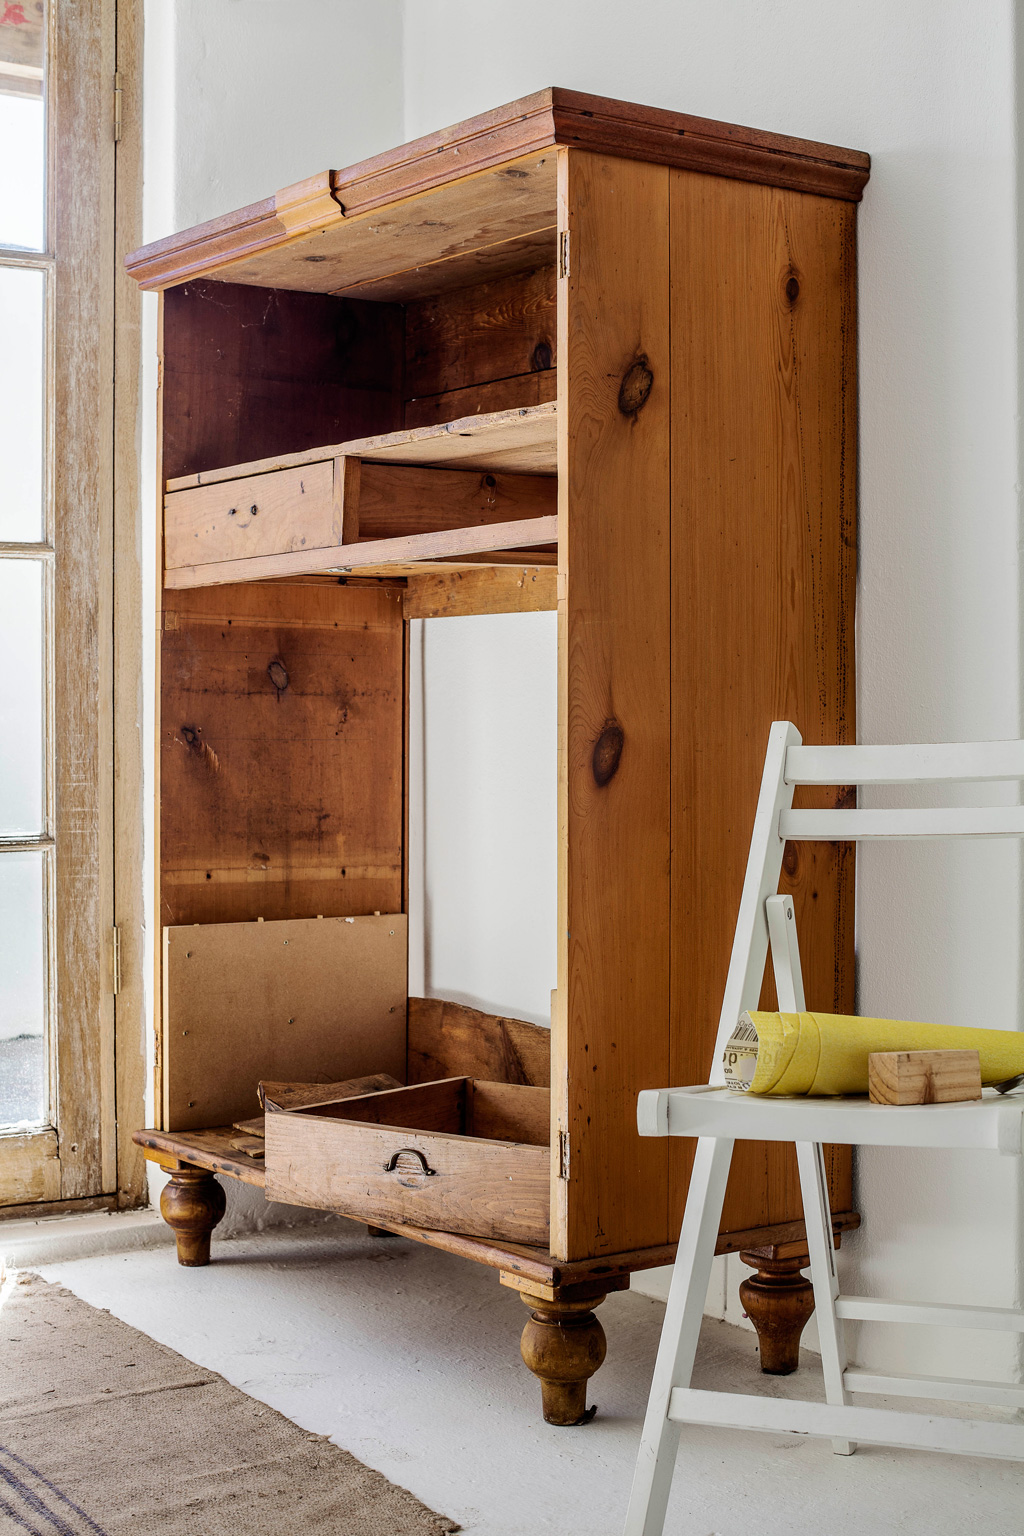
1. PREPARING THE CUPBOARD
The old cupboard was cleaned up; old varnish was removed by giving it a good sanding with 160 grit sand paper. All previous holes were filled with wood filler, and once dry, given a light sand with 180 grit sand paper for a smooth finish. The old pieces of backing were removed and two new backing boards were cut out of pegboard and slotted in. These were fastened into place with panel pins. The whole cupboard was painted with a glossy white paint.
2. USING THE TEMPLATE
Templates of letters spelling CREATE BEAUTY were cut out of acetate and painted in a very pale colour.
How to do this
1. Print the letters in the desired font and size on normal A4 paper.
2. Lay the acetate over the paper and cut out the letter templates.
3. Place the acetate where the wording will be positioned and paint the letters with a small paint brush on the backing board.
3. ADDING THE LIGHTS
Use nails as indicators to show positioning and push fairy lights through so that they sit snugly in the pegboard. Switch on the lights to bring the words to life.
TIPS
1. If one of the drawer handles is missing, tie a pretty ribbon to the hooks and add a personalised handle.
2. If you struggle to get the fairy lights through the pegboard holes, take a drill bit a size bigger than the hole and enlarge it slightly.
GOOD TO KNOW
Panel pins are designed to fix sheeting material (like pegboard) to furniture. The heads of the pins are easily disguised by pushing them below the surface so they can’t be seen.
FOR A CELEBRATION
The outline of a tree or star can be drawn on the back of the board and the lights can be replaced into the pattern to create a novel theme with seasonal appeal.
You can purchase the book directly from Misi on her website.